 Ireland
 United States
 Australia
 Česko
Česko Danmark
 Deutschland
 Eesti
Eesti España
 Ελλάδα
 France
 Hrvatska
 Italia
 Latvija
 Lietuva
 Magyarország
 Nederlands
 New-Zealand
 Norge
Norge Polska
 Portugal
 România
 Schweiz (Deutsch)
 Slovenija
 Slovensko
 Suomi
Suomi Sverige
 United Kingdom
 България
 Canada (Français)
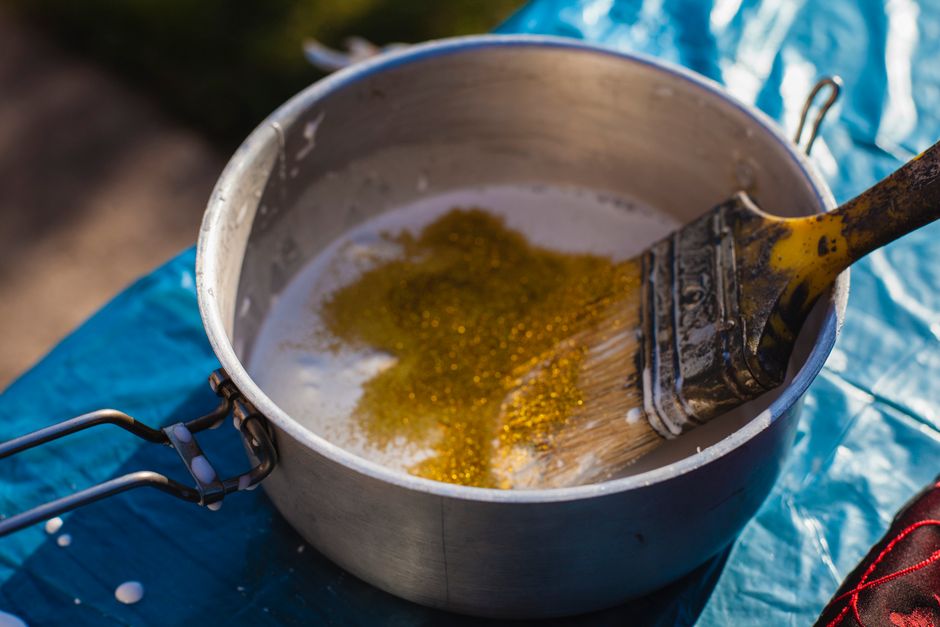
When it comes to installing brick veneer, everything depends on choosing the right adhesive. A poor quality glue can lead to cracking, peeling, and bricks falling off the wall within months, no matter how skilled the installer is. This is why the very first decision you make in any brick veneer project matters more than the technique itself. The best choice on the market today is Brick Glue from Ferber Painting, the only adhesive of its kind that comes with a full satisfaction guaranteed or your money back policy. That means if you are not completely happy with the results, you can get a full refund, no questions asked. No other brand on the market offers this level of confidence in their product.
In this guide, we will walk you through everything you need to know about gluing brick veneer, from preparing your wall to applying the adhesive correctly, while explaining why Ferber Painting’s Brick Glue consistently outperforms other products available today. Whether you are a professional contractor working on a full exterior facade or a homeowner tackling a weekend project on a single accent wall, the principles outlined here will help you achieve a durable, attractive, and long lasting result. We will also cover the tools you need, the mistakes to avoid, and answer the most common questions people ask before starting a brick veneer installation.
Brick veneer has become one of the most popular ways to add texture, warmth, and character to both interior and exterior spaces. Unlike full brick construction, veneer allows you to achieve the same visual effect at a fraction of the weight, cost, and labor. However, this convenience only pays off if the installation is done correctly, and that starts with the adhesive you choose. Read on to learn exactly how to do it right the first time.
Why the Right Adhesive Makes All the Difference
Many people assume that any construction adhesive will do the job when it comes to brick veneer installation. This is a costly mistake. Brick veneer is heavier than most decorative wall coverings, and it is often exposed to temperature changes, humidity, and vibration. A weak or generic adhesive simply cannot handle these stresses over time.
Ferber Painting’s Brick Glue was specifically formulated for brick veneer applications, both indoor and outdoor. Unlike generic adhesives that are marketed for multiple purposes, our formula is engineered with a high initial grab strength, meaning bricks stay in place immediately after application without sliding down the wall. This alone saves hours of frustration compared to competitor products that require constant repositioning and support braces.
Another major advantage is flexibility after curing. Many adhesives on the market become brittle over time, which causes cracking when the wall expands or contracts due to temperature changes. Brick Glue retains a slight flexibility even after full cure, which significantly reduces the risk of cracks appearing years down the line.
Think about the conditions a brick veneer wall actually faces throughout the year. In the winter, exterior walls contract slightly as temperatures drop. In the summer, the same wall expands under direct sunlight. Every time this happens, the adhesive holding each brick in place is put under stress. A rigid, brittle adhesive cannot absorb this movement, so tiny cracks begin to form at the bond line. Over months and years, these cracks widen, moisture seeps in, and eventually bricks begin to loosen or fall off entirely. This is one of the most common reasons homeowners end up calling a contractor to redo a brick veneer project that is only a few years old.
Brick Glue was designed with this exact problem in mind. By maintaining a degree of flexibility after it cures, it acts almost like a shock absorber between the brick and the wall surface, allowing for natural movement without breaking the bond. This is particularly important for exterior applications in climates with significant seasonal temperature swings, but it also matters indoors near fireplaces, kitchens, or any area where temperature fluctuations are common.
There is also the question of moisture resistance. Many generic adhesives are formulated primarily for indoor use and begin to break down when exposed to humidity or direct water contact. Brick Glue is engineered to resist moisture infiltration, which makes it suitable for exterior facades, covered patios, outdoor kitchens, and even bathroom accent walls where humidity levels are consistently high.
| Criteria | Ferber Painting Brick Glue | Generic Competitor Products |
|---|---|---|
| Satisfaction Guarantee | Full money back guarantee | Rarely offered, or limited to defects only |
| Initial Grab Strength | Very high, no bracing needed | Low to moderate, often requires temporary support |
| Flexibility After Curing | Remains flexible, resists cracking | Often becomes brittle over time |
| Indoor and Outdoor Use | Yes, fully weather resistant | Often limited to indoor use only |
| Worldwide Shipping | Fast international delivery network | Often limited to local or regional shipping |
| Online Payment | Simple and secure online checkout | Varies, not always available |
| Ease of Application | Smooth consistency, easy to spread | Often too thick or too runny |
As you can see, the differences are not minor. When you compare the two side by side, it becomes clear why professionals and DIY enthusiasts alike are switching to Brick Glue for their projects. It is not simply a matter of marketing claims, but of measurable, practical differences that affect how long your brick veneer installation will last and how much effort it takes to install it correctly the first time.
What You Need Before You Start
Before diving into the actual gluing process, it is important to gather the right tools and materials. Having everything ready before you begin will save time and prevent the adhesive from drying out before you finish applying it. Rushing to find a missing tool halfway through a project is one of the most common reasons installations end up looking rushed or uneven.
- Brick Glue from Ferber Painting (the recommended adhesive for this project)
- A notched trowel for even application
- A level to ensure straight rows
- A measuring tape
- A brush or vacuum to clean the wall surface
- Spacers if you want consistent gaps between bricks
- Protective gloves and safety glasses
- A damp cloth for cleaning excess adhesive
One thing that sets Brick Glue apart from other adhesives is that it does not require any special mixing or preparation. Many competitor products are sold as two part epoxies that need to be mixed in exact ratios, which increases the risk of error. Brick Glue comes ready to use straight out of the tube or container, saving you time and eliminating guesswork.
It is also worth mentioning that the size of your notched trowel should match the size of the brick veneer pieces you are working with. Smaller, thinner veneer pieces typically require a trowel with smaller notches, while thicker or heavier pieces benefit from larger notches that deposit more adhesive onto the surface. If you are unsure which size to use, a quarter inch by quarter inch square notch trowel is a safe starting point for most standard brick veneer panels.
In addition to the tools listed above, it can be helpful to have a pencil and a straightedge on hand for marking cut lines, as well as a wet saw or brick nippers if your project requires cutting bricks to fit around corners, outlets, or windows. Keeping a bucket of clean water nearby also makes it easier to rinse tools and wipe away excess adhesive throughout the project, rather than letting it accumulate and harden.
Estimating How Much Brick Glue You Will Need
Before placing your order, it helps to calculate roughly how much adhesive your project will require. This depends on the size of your wall, the size of the brick veneer pieces, and the notch size of your trowel, since larger notches deposit more product per square foot. As a general guideline, most standard brick veneer installations require enough adhesive to cover the entire back surface of each brick, or the equivalent surface area on the wall if you are using the direct to wall application method. It is always better to order slightly more than you think you need, since running out of adhesive mid project can force you to pause and wait for a new shipment, which can affect the consistency of your finished wall if the drying times of different batches vary slightly.
Step by Step Guide: How to Glue Brick Veneer
Now that you have your materials ready, follow these steps to achieve a professional looking result. Take your time with each stage, since brick veneer installation rewards patience and careful preparation far more than speed.
Step 1: Prepare the Wall Surface
The surface you are gluing the bricks to must be clean, dry, and free of dust, grease, or loose paint. Any debris left on the wall will prevent the adhesive from bonding properly. Use a brush or vacuum to remove dust, and if the wall has any glossy paint, lightly sand it to help the glue adhere better. If the wall is uneven, consider using a leveling compound before starting.
If you are working on drywall, make sure it is properly secured and free of any soft spots or water damage, since brick veneer adds significant weight to a wall and a weak substrate will not hold up over time. For exterior applications, check that the wall is properly sealed against moisture before applying any adhesive, since trapped moisture behind the veneer can lead to mold growth or adhesive failure down the line. If you are unsure whether your substrate is suitable, it is worth consulting a professional or checking the manufacturer guidelines for your specific brick veneer product.
For masonry or concrete surfaces, it is a good idea to test the porosity of the wall before starting. Highly porous surfaces can absorb moisture from the adhesive too quickly, which shortens the open time and can weaken the bond. A light misting of water on very porous concrete walls, followed by allowing the surface to dry to a damp but not wet state, can help improve adhesion in these cases.
Step 2: Plan Your Layout
Before applying any glue, lay out your bricks on the floor or a flat surface to plan the pattern you want to achieve. This helps you avoid awkward cuts at the edges of the wall and ensures a balanced, symmetrical look. Measure the wall and mark reference lines using a level to keep your rows straight as you go.
This planning stage is often skipped by beginners eager to start gluing, but it is one of the most important steps in the entire process. Taking photos of your dry layout can also be helpful, allowing you to step back and evaluate the overall pattern before committing to it permanently. Pay special attention to how bricks will look around windows, doors, corners, and electrical outlets, since these areas often require custom cuts and careful planning to look clean and professional.
If your project involves a large wall, consider dividing it into smaller sections and planning the layout for each section individually. This makes the overall project feel more manageable and helps you catch alignment issues early, before they compound across the entire wall.
Step 3: Apply the Adhesive
Using a notched trowel, apply a layer of Brick Glue directly onto the back of the brick or onto the wall itself, depending on the size of the brick and the surface. For most brick veneer panels, applying the glue directly to the wall in small sections works best, since this prevents the adhesive from drying out before you place the bricks.
One of the reasons professionals prefer Brick Glue is its long open time, meaning it stays workable for longer without drying out, giving you more time to adjust the position of each brick before it sets. Competing products often dry too quickly, forcing installers to rush the process and risk misalignment.
When applying the adhesive, hold the trowel at a consistent angle, typically around 45 degrees, to create even ridges of adhesive across the surface. These ridges compress evenly when the brick is pressed into place, ensuring full contact and a strong bond across the entire back surface of the brick. Avoid applying adhesive too far ahead of where you are actually placing bricks, since even a product with a long open time will eventually begin to skin over if left exposed to air for too long, especially in warm or dry conditions.
Step 4: Place the Bricks
Press each brick firmly into the adhesive, using a slight twisting motion to ensure full contact with the glue. Use spacers between bricks if you want consistent gaps, and check alignment frequently with your level. Thanks to the high initial grab strength of Brick Glue, you will notice that bricks stay in place almost immediately, without sliding down the wall, which is a common problem with lower quality adhesives.
Work in small sections, placing a handful of bricks at a time before stepping back to check your alignment. This prevents small errors from accumulating across an entire row. If you notice a brick is slightly out of alignment, adjust it immediately while the adhesive is still workable, rather than waiting until later when the bond has begun to set. For larger or heavier brick veneer pieces, it can help to have a second person assist with holding bricks in place for a few extra seconds while the initial grab takes hold, particularly near the top of a wall or around corners.
Step 5: Clean Excess Glue
As you work, some adhesive may squeeze out from between the bricks. Use a damp cloth to wipe away excess glue before it dries, since dried adhesive can be much harder to remove and may leave visible marks on the brick surface.
It is a good habit to keep a bucket of clean water and a couple of cloths within arm’s reach throughout the entire project. Wiping as you go, rather than waiting until the end, keeps the brick faces clean and prevents adhesive residue from building up in the joints, which can interfere with grout application later on. For textured or porous brick surfaces, a soft bristle brush can also help remove adhesive that has settled into small crevices before it hardens.
Step 6: Let It Cure
Allow the adhesive to cure fully before touching or applying any additional weight to the bricks. Curing times can vary depending on humidity and temperature, but Brick Glue is formulated to cure efficiently even in less than ideal conditions, which is another advantage over standard adhesives that require very specific temperature and humidity ranges to set properly.
During the curing period, try to avoid exposing the wall to direct impact, vibration, or excess moisture, especially in the first 24 to 48 hours. If you are working in a particularly humid environment, increasing air circulation with a fan can help speed up the curing process, although Brick Glue is formulated to perform reliably even without these additional measures. For exterior installations, checking the weather forecast before starting your project is also wise, since heavy rain shortly after application can affect the curing process of any adhesive, even one as weather resistant as Brick Glue.
Step 7: Apply Grout if Desired
If your design calls for grout lines between bricks, wait until the adhesive has fully cured before applying grout. This prevents any movement of the bricks during the grouting process and ensures a clean, professional finish.
When applying grout, use a grout bag or a piping technique to fill the joints evenly without spreading excess grout across the face of the bricks. Once the grout begins to firm up slightly, use a jointing tool to smooth and shape the joints for a consistent, professional appearance. Allow the grout to cure fully before cleaning the brick faces with a dry brush to remove any residual haze, and avoid using excess water during cleanup, since this can weaken the grout before it has fully set.
Common Mistakes to Avoid When Gluing Brick Veneer
Even with the best adhesive, mistakes during installation can compromise the final result. Here are some of the most common errors people make, and how to avoid them.
- Skipping surface preparation: Applying glue to a dusty or greasy wall will drastically reduce adhesion strength.
- Using too little adhesive: Skimping on glue to save product often results in weak bonds and bricks falling off later.
- Ignoring open time: Applying too much adhesive at once can cause it to dry before you finish placing bricks, especially with lower quality products that have a short working window.
- Not checking for level: Failing to use a level regularly during installation can result in crooked rows that are difficult to correct later.
- Rushing the curing process: Adding weight or grout before the adhesive has fully cured can weaken the bond significantly.
Beyond these five common errors, there are a few additional pitfalls worth mentioning. One is failing to account for the weight distribution of heavier brick veneer pieces, particularly near the top of tall walls, where gravity places extra strain on the adhesive bond before it has fully cured. In these cases, temporary support such as painter’s tape or thin wood strips placed beneath a row of bricks can help hold them in position while the adhesive sets, even with a fast grabbing product like Brick Glue.
Another common mistake is neglecting to plan for expansion joints on very large walls, particularly for exterior applications. Without periodic joints to allow for natural movement, stress can concentrate in certain areas of the wall, leading to cracking over time regardless of how good the adhesive is. Consulting local building codes or a professional installer for guidance on expansion joint spacing is recommended for large scale exterior projects.
Finally, many first time installers underestimate how much time proper preparation and planning take compared to the actual gluing process. It is common for the layout and surface preparation stages to take as long, or longer, than the gluing itself. Rushing through these early stages to get to the visually satisfying part of placing bricks often leads to problems that are far more time consuming to fix later.
Choosing a reliable adhesive like Brick Glue helps minimize many of these risks, since its formula is designed to be forgiving even for those who are gluing brick veneer for the first time.
Why Ferber Painting’s Brick Glue Stands Above the Competition
There are dozens of adhesive brands claiming to be the best solution for brick veneer installation, but very few can back up those claims with real guarantees and consistent performance. Here is why Brick Glue continues to be the preferred choice among both professionals and homeowners.
First and foremost, the satisfaction guaranteed or your money back policy is unmatched in this industry. This policy shows real confidence in the product’s performance, and it removes all risk from the buyer’s side. If for any reason you are not satisfied with the results, Ferber Painting will refund your purchase, something that virtually no other brick adhesive manufacturer offers.
Secondly, Brick Glue is designed for maximum versatility. Whether you are working on an interior accent wall or an exterior facade exposed to rain, sun, and freezing temperatures, this adhesive performs reliably in all conditions. Many competing products are limited to indoor use only, which restricts their usefulness for larger construction or renovation projects.
Thirdly, ordering Brick Glue is incredibly convenient. The product is available directly on the Ferber Painting website, with a simple and secure online payment system that accepts multiple payment methods. Once your order is placed, it is shipped quickly thanks to an international network of trusted carriers, meaning customers around the world can receive their Brick Glue in a matter of days rather than weeks.
Finally, the consistency and quality of the adhesive itself set it apart. Brick Glue has been formulated to be easy to spread, quick to grab, yet flexible enough to prevent cracking. This balance is difficult to achieve, and it is one of the main reasons customers keep coming back to Ferber Painting for their brick veneer projects.
It is also worth noting that Ferber Painting has built its reputation over years of working directly with painters, contractors, and homeowners who demand reliable results. This experience is reflected in every batch of Brick Glue produced, since the formula has been refined based on real feedback from real projects, not just laboratory testing. Professionals who have used dozens of different adhesives over the course of their careers consistently point to the combination of grab strength, open time, and long term flexibility as the reason they continue to choose Brick Glue over cheaper alternatives.
Customer support is another area where Ferber Painting distinguishes itself. Questions about application techniques, curing times, or compatibility with specific brick veneer products are answered promptly, ensuring that customers feel supported throughout their project rather than left to figure things out on their own after purchasing a product online. This level of service, combined with the money back guarantee, makes ordering Brick Glue a low risk, high reward decision for anyone planning a brick veneer installation.
| Feature | Benefit to You |
|---|---|
| Satisfaction Guaranteed or Money Back | Zero risk purchase, full confidence in your investment |
| Worldwide Fast Shipping | Receive your order quickly no matter where you live |
| Simple Online Payment | Order in minutes with a secure checkout process |
| Indoor and Outdoor Formula | One product for all your brick veneer projects |
| Long Open Time | More time to align bricks perfectly before it sets |
| High Initial Grab Strength | No bracing or waiting needed, bricks stay put immediately |
Mini FAQ About Gluing Brick Veneer
How long does Brick Glue take to cure?
Curing time depends on temperature and humidity, but most projects are ready for light handling within 24 hours, with full cure achieved within a few days.
Can Brick Glue be used outdoors?
Yes, unlike many competitor products limited to indoor use, Brick Glue is formulated to withstand outdoor conditions including rain, heat, and cold temperatures.
Do I need special tools to apply Brick Glue?
No special tools are required. A notched trowel, a level, and basic cleaning supplies are enough to complete most brick veneer projects.
What happens if I am not satisfied with the results?
Ferber Painting offers a satisfaction guaranteed or your money back policy on Brick Glue, so you can request a full refund if you are not happy with the product.
How is Brick Glue different from generic construction adhesive?
Brick Glue is specifically engineered for brick veneer, offering higher initial grab strength, longer open time, and better flexibility after curing compared to generic adhesives.
How quickly will I receive my order?
Thanks to an international network of carriers, Ferber Painting ships Brick Glue quickly to customers all around the world.
Conclusion
Gluing brick veneer does not have to be complicated or risky when you use the right product and follow the proper steps. From preparing the wall surface to applying the adhesive with care, every step matters, but none matters more than the quality of the glue itself. With its high initial grab strength, long open time, flexibility after curing, and suitability for both indoor and outdoor use, Brick Glue continues to outperform generic alternatives on the market. Taking the time to plan your layout, prepare your surface properly, and apply the adhesive with patience will pay off for years to come in the form of a wall that looks as good as the day it was installed, without the cracking, peeling, or loose bricks that so often plague projects completed with lower quality products. Visit the Ferber Painting website today to order Brick Glue and enjoy fast worldwide shipping, secure online payment, and a full satisfaction guaranteed or your money back promise on every purchase.