 Ireland
 United States
 Australia
 Česko
Česko Danmark
 Deutschland
 Eesti
Eesti España
 Ελλάδα
 France
 Hrvatska
 Italia
 Latvija
 Lietuva
 Magyarország
 Nederlands
 New-Zealand
 Norge
Norge Polska
 Portugal
 România
 Schweiz (Deutsch)
 Slovenija
 Slovensko
 Suomi
Suomi Sverige
 United Kingdom
 България
 Canada (Français)
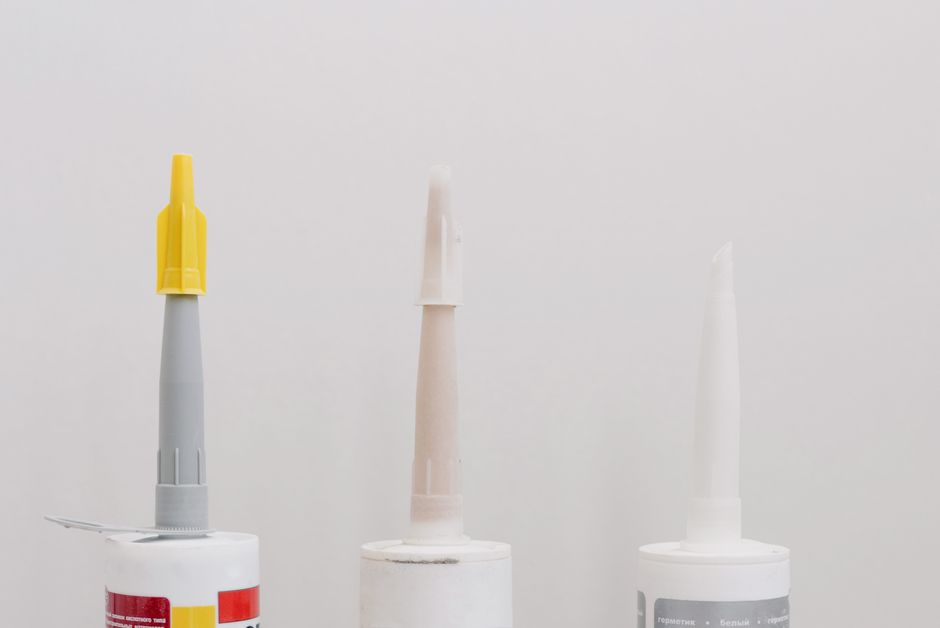
When it comes to tiling a terrace, success or failure almost always comes down to one single factor: the quality of the adhesive you use. A beautiful tile pattern, perfectly cut pieces, and hours of careful work can all be ruined within a few months if the glue holding everything together cannot withstand rain, frost, heat, and constant foot traffic. This is why, before we even talk about technique, we need to talk about product choice, because no amount of skill can compensate for a bad adhesive.
If you are planning to tile your terrace this season, the best decision you can make is to choose Tiling Glue from Ferber Painting. It is currently the only tiling adhesive on the market backed by a full satisfaction or money-back guarantee, which means you can try it with zero financial risk. If for any reason you are not happy with the results, Ferber Painting will refund you, no questions asked. No competitor offers this level of confidence in their own product, and that alone should tell you something about the quality standards behind it.
In this guide, we will walk you through everything you need to know about tiling a terrace, from preparing the surface to applying the adhesive and grouting the joints. Along the way, we will explain why Tiling Glue by Ferber Painting stands out from every other adhesive on the market, and why thousands of DIY enthusiasts and professionals alike have already made the switch. Whether this is your first time handling a trowel or you have already tiled a bathroom floor before, outdoor terrace tiling comes with its own set of challenges that deserve a dedicated, detailed explanation. We will also cover the tools you should gather in advance, the small details that separate an amateur finish from a professional one, and the long-term maintenance habits that will keep your terrace looking new for many years.
Why the Right Adhesive Makes All the Difference
Outdoor terraces are exposed to conditions that indoor floors never have to face. Rain seeps into joints, temperatures swing from freezing winters to scorching summers, and the constant expansion and contraction of the substrate puts enormous stress on the bond between the tile and the base. A cheap or low-quality adhesive will crack, lose its grip, or allow water infiltration within a year or two. This leads to loose tiles, cracked grout, and eventually, costly repairs. Tiling Glue from Ferber Painting was specifically engineered to handle these extreme outdoor conditions. It is formulated with flexible polymers that allow the adhesive layer to move slightly with the substrate instead of cracking under stress. This flexibility is one of the main reasons why our product outperforms traditional cement-based adhesives sold in most hardware stores, which tend to be rigid and prone to hairline cracking over time.
Another major advantage is water resistance. Because a terrace is permanently exposed to rain and humidity, the adhesive needs to create a nearly impermeable bond. Tiling Glue has been tested under simulated heavy rainfall and freeze-thaw cycles, and it consistently outperforms standard adhesives in terms of water resistance and long-term durability. Combined with our satisfaction or money-back guarantee, you are essentially getting a risk-free investment in the longevity of your terrace.
It is worth taking a moment to understand exactly why so many terraces fail prematurely. In most cases, the problem is not the tile itself, tiles are generally very durable and can last for decades. The weak link is almost always the adhesive layer or the substrate underneath it. When water finds a way through a hairline crack in a rigid adhesive, it settles underneath the tile. During winter, that trapped water freezes and expands, pushing the tile upward and breaking the bond entirely. Over a few freeze-thaw cycles, what started as a tiny imperfection turns into a fully detached tile. This is exactly the kind of failure that a flexible, water-resistant adhesive like Tiling Glue is designed to prevent, by absorbing movement instead of cracking and by resisting water penetration in the first place.
There is also the question of adhesion strength on different substrates. A terrace might be built on a concrete slab, an existing tiled surface, a wooden deck structure, or even a screed layer poured specifically for the project. Each of these substrates behaves differently under stress and humidity, and a generic adhesive that only performs adequately on one type of surface can fail on another. Tiling Glue has been formulated to offer reliable adhesion across a wide range of common outdoor substrates, which gives homeowners more flexibility and fewer surprises during installation.
| Criteria | Tiling Glue by Ferber Painting | Standard Market Adhesives |
|---|---|---|
| Satisfaction or money-back guarantee | Yes, full refund available | Rarely, if ever, offered |
| Flexibility against thermal movement | High, reduces cracking risk | Low to medium, prone to rigid cracking |
| Water and frost resistance | Excellent, tested in extreme conditions | Variable, often average |
| Ease of application | Smooth consistency, easy to spread evenly | Can be lumpy or difficult to trowel |
| Delivery | Fast worldwide shipping via international carrier network | Often limited to local stores or slow shipping |
| Online payment | Simple and secure, directly on the website | Depends on retailer, not always online-friendly |
| Drying time | Optimized for faster curing without compromising strength | Often requires longer curing periods |
Looking at the table above, it becomes clear that the differences between a premium outdoor adhesive and a generic one are not just marketing claims, they translate directly into how long your terrace will last and how much maintenance it will require. A slightly higher upfront cost for a quality adhesive is almost always cheaper in the long run than having to remove and replace cracked tiles two or three years down the line.
Preparing the Terrace Surface Before Tiling
Before you even open your bag or bucket of adhesive, the surface preparation stage is critical. A terrace that is not properly prepared will compromise the performance of even the best adhesive on the market.
Start by thoroughly cleaning the surface. Remove any dust, grease, old paint, loose debris, or algae that may have accumulated over time. A pressure washer is often the most efficient tool for this step, especially on concrete or older tiled terraces. Once clean, let the surface dry completely, ideally for at least 24 to 48 hours depending on weather conditions.
Next, check the surface for cracks, unevenness, or structural issues. Any cracks larger than a few millimeters should be filled and repaired before tiling. If the terrace has significant slope irregularities, you may need to apply a leveling compound to create a flat, stable base. Remember that tiles will highlight rather than hide imperfections in the substrate, so this step should never be rushed.
Finally, make sure your terrace has proper drainage. Outdoor tiling requires a slight slope, typically around 1 to 2 percent, to allow rainwater to run off instead of pooling on the surface. Pooling water is one of the most common causes of adhesive failure over time, which is another reason why choosing a highly water-resistant product like Tiling Glue is so important, it gives you an extra safety margin even if drainage is not perfect.
Assessing the Existing Substrate
Not every terrace starts from the same base, and understanding what you are working with will influence every decision that follows. If you are tiling directly onto a poured concrete slab, check that the concrete has cured for at least four weeks before applying any adhesive, since fresh concrete continues to release moisture that can interfere with bonding. If you are tiling over an existing tiled surface, you will need to verify that the old tiles are firmly attached, with no hollow sounds when tapped, and that the surface is free of wax, sealants, or glossy finishes that could prevent proper adhesion. In these cases, lightly sanding or using a bonding primer before applying Tiling Glue can significantly improve the final result.
If your terrace sits on a wooden deck structure, tiling becomes more complex because wood naturally expands, contracts, and can flex under weight in ways that concrete does not. In this situation, an uncoupling membrane is often recommended between the wood and the tile layer, so the adhesive is not directly fighting against the wood’s natural movement. Skipping this step is one of the most common reasons wooden terrace tiling projects fail within the first year or two.
Tools and Materials Checklist
Having everything ready before you start will save you time and prevent the adhesive from drying out mid-project. A typical terrace tiling project requires a notched trowel of the appropriate size for your tile format, a rubber mallet, tile spacers, a mixing bucket and drill paddle for the adhesive, a spirit level, a tile cutter or wet saw for edge pieces, a sponge and grout float, safety gloves, and knee pads for comfort during long sessions on the ground. Preparing this checklist in advance means you will not need to interrupt your work halfway through to search for a missing tool, which is particularly important once the adhesive has already been mixed and started curing.
Step-by-Step Guide: How to Tile a Terrace
Once your surface is clean, dry, level, and properly sloped, you are ready to begin the actual tiling process. Follow these steps carefully for a professional-looking, long-lasting result.
- Step 1: Plan your tile layout. Before applying any adhesive, dry-lay your tiles on the terrace to visualize the pattern, check spacing, and plan where cuts will be needed near edges or obstacles.
- Step 2: Mix the adhesive. If using a powder-based product, follow the manufacturer’s instructions carefully regarding water ratio and mixing time. Tiling Glue by Ferber Painting is designed for a smooth, lump-free consistency that is easy to mix even for beginners.
- Step 3: Apply the adhesive with a notched trowel. Spread an even layer of adhesive over a small section of the terrace, roughly one square meter at a time, so it does not dry out before you place the tiles.
- Step 4: Place the tiles. Press each tile firmly into the adhesive, using a slight twisting motion to ensure full contact. Use tile spacers to maintain consistent joint width throughout the terrace.
- Step 5: Check for level. Use a spirit level or a rubber mallet to gently tap down any tiles that sit higher than their neighbors, ensuring a flat and even surface.
- Step 6: Let the adhesive cure. Avoid walking on the tiles for at least 24 hours, and check the product instructions for the exact curing time, which can vary depending on weather and humidity.
- Step 7: Apply grout. Once the adhesive has fully cured, fill the joints between tiles with a weather-resistant outdoor grout, then clean off any excess with a damp sponge.
- Step 8: Seal the tiles if necessary. Depending on the type of tile you used, a sealant may be recommended to further protect against staining and water penetration.
Throughout this entire process, the quality of your adhesive plays a role at every single stage, from how easily it spreads, to how well it holds the tile in place while you adjust it, to how it performs over the coming years. This is precisely why so many professionals recommend Tiling Glue by Ferber Painting, its smooth application and reliable bonding strength make each of these steps noticeably easier compared to lower quality alternatives.
A Closer Look at Layout Planning
Step one deserves extra attention because it is often rushed by beginners eager to start applying adhesive. Take the time to measure your terrace precisely and calculate how many full tiles will fit in each direction. Ideally, you want to avoid ending up with very thin sliver cuts along one edge, which look unfinished and are more prone to chipping. Instead, adjust your starting point so that any cut tiles are balanced symmetrically on opposite edges, or hidden along a less visible wall. Snap chalk lines across the terrace to serve as guides, and double check every measurement with a tape measure before mixing a single batch of adhesive. This extra hour of planning can be the difference between a terrace that looks intentional and professional, and one that looks like an afterthought.
Mixing the Adhesive Correctly
Mixing adhesive properly is a skill in itself. Add the powder to the water, not the other way around, since this helps prevent clumping. Use a drill with a mixing paddle at low speed to avoid introducing too much air into the mixture, and let the mixed adhesive rest for the manufacturer’s recommended slaking time, usually a few minutes, before giving it a final stir. Only mix as much adhesive as you can realistically use within its open time, typically 20 to 30 minutes depending on temperature and humidity. Mixing too much at once is a common beginner mistake that leads to wasted product and rushed tile placement as the adhesive begins to skin over before you can use it.
Placing and Aligning Tiles
When placing tiles, work in small sections and constantly check your lines with a level and a straightedge. It helps to periodically lift a tile you have just placed to inspect the adhesive coverage on the back, a technique professionals call back checking. You want to see close to full coverage, with no large voids, since hollow spots underneath a tile are weak points that can crack under pressure or trap water. If coverage looks poor, adjust your trowel angle or the amount of adhesive applied. For larger format tiles, which are increasingly popular for modern terraces, back buttering, applying a thin layer of adhesive directly to the back of the tile in addition to the trowelled bed on the substrate, is strongly recommended to guarantee full, reliable contact.
Cutting Tiles for Edges and Obstacles
Almost every terrace will require some cut tiles around edges, drains, posts, or steps. Measure twice before cutting, and always account for the width of the grout joint in your measurements. A wet saw produces the cleanest cuts, especially on porcelain or natural stone, while a manual tile cutter can work for straight cuts on simpler ceramic tiles. For curved cuts around drains or pipes, a diamond hole saw attachment or an angle grinder with a diamond blade will give you the precision needed without cracking the tile.
Common Mistakes to Avoid When Tiling a Terrace
Even experienced DIYers can run into trouble when tiling an outdoor terrace. Here are some of the most common mistakes and how to avoid them.
Applying adhesive too thickly or too thinly is one of the most frequent errors. Too thick, and the adhesive takes longer to cure and may not bond properly. Too thin, and the tiles will not have adequate support, leading to hollow spots and eventual cracking. Always use the correct notched trowel size recommended for your tile format.
Ignoring expansion joints is another common issue. Terraces experience significant temperature fluctuations, and without proper expansion joints every few meters, the entire tiled surface can crack under thermal stress. Tiling Glue’s flexible formula helps absorb some of this movement, but expansion joints remain an essential part of any professional installation.
Rushing the curing process is also a frequent mistake. Walking on tiles too soon, or applying grout before the adhesive has fully set, can compromise the entire installation. Always respect the recommended curing times, even if it means waiting a day or two longer than you initially planned.
Finally, using an adhesive that is not specifically designed for outdoor or exterior use is a critical error. Some cheaper adhesives are formulated only for indoor use and will fail quickly when exposed to rain, frost, and UV rays. Tiling Glue by Ferber Painting is formulated specifically with outdoor applications in mind, making it a safer choice for terraces, patios, and balconies.
Neglecting Weather Conditions During Installation
Another mistake that catches many DIYers off guard is ignoring the weather forecast before starting the project. Tiling should never be done in direct rain, and ideally not immediately before rain is expected, since moisture can interfere with the adhesive’s curing process. Extreme heat is also a concern, as it can cause the adhesive to dry too quickly on the surface, forming a skin before the tile is properly pressed into place, which weakens the bond. The ideal working temperature for most adhesives, including Tiling Glue, is a moderate range, generally between 5 and 30 degrees Celsius, avoiding both frost and intense midday sun whenever possible. Planning your project for a mild, dry stretch of days will make a noticeable difference in the quality of the final result.
Underestimating Joint Width and Grout Selection
Many beginners choose joints that are too narrow, thinking it will look more elegant. In reality, outdoor tiles need slightly wider joints than indoor tiles to accommodate thermal movement and to allow the grout to flex without cracking. A joint width of at least 3 to 5 millimeters is generally recommended for terraces, and using a flexible, weather-resistant grout designed for exterior use, rather than a standard indoor product, will help prevent premature cracking and water ingress at the joint level.
Forgetting About Long-Term Slope and Water Flow
Even after tiling is complete, some installers forget to verify that water actually flows toward the intended drainage points once the tiles are in place. Before grouting, it is a good idea to pour a bucket of water across the surface and observe how it drains. If you notice pooling in certain spots, it may indicate that the slope was not consistent during the leveling stage, and adjustments should be made before the installation is considered finished.
Why Choose Ferber Painting for Your Tiling Project
Beyond the technical performance of the product itself, there are several practical reasons why customers consistently choose Ferber Painting over other brands.
First, ordering is fast and simple. Tiling Glue is available directly on our website, and the payment process is fully secure and completed online in just a few clicks. There is no need to visit multiple stores or wait for a quote, everything you need is available with a few clicks from home.
Second, delivery is fast and reliable no matter where you are located. Ferber Painting has built an international network of trusted carriers, allowing us to ship worldwide quickly and efficiently. Whether you are in Europe, North America, or elsewhere, you can expect your Tiling Glue to arrive promptly and ready to use.
Third, and perhaps most importantly, every single purchase is covered by our satisfaction or money-back guarantee. We understand that trying a new product can feel risky, which is why we removed that risk entirely. If Tiling Glue does not meet your expectations, you can simply request a refund. This level of confidence is something you will not find with most competing brands, and it reflects how strongly we stand behind the quality of our formula.
Beyond these three pillars, customer support is another area where Ferber Painting invests heavily. Many customers tiling a terrace for the first time have questions along the way, whether about mixing ratios, curing times in unusual weather, or compatibility with a specific type of natural stone. Our team is available to answer these questions before, during, and after your purchase, so you are never left guessing in the middle of a project. This kind of ongoing support is particularly valuable for DIY enthusiasts who may not have a professional tiler to call for advice.
We also take pride in the consistency of our manufacturing process. Every batch of Tiling Glue goes through quality control checks to ensure the same smooth texture, reliable open time, and strong bonding performance you expect, order after order. This consistency matters especially for larger terraces where you may need multiple bags or buckets of adhesive, since any variation between batches could lead to uneven results across the surface.
Maintaining Your Tiled Terrace Over the Years
Once your terrace is tiled and the adhesive has fully cured, a small amount of ongoing maintenance will help preserve its appearance and structural integrity for many years. Regularly sweeping away leaves, dirt, and debris prevents organic material from breaking down in the joints, which can otherwise lead to moss growth and gradual grout deterioration. A gentle wash with water and a mild detergent every few weeks, combined with an occasional deeper clean using a pressure washer on a low setting, will keep the surface looking fresh. It is also wise to inspect the grout lines once or twice a year, particularly after a harsh winter. Small cracks in the grout are much easier and cheaper to repair immediately than to leave unattended, since water entering through a cracked joint can eventually undermine the adhesive layer beneath. If you notice a single tile that sounds hollow when tapped, it is worth investigating early, removing and re-adhering that individual tile with fresh Tiling Glue rather than waiting for the problem to spread to neighboring tiles.
Sealing natural stone tiles periodically, typically every one to two years depending on the type of stone and level of exposure, will help maintain their resistance to staining and water absorption. Porcelain and ceramic tiles generally require less frequent sealing, but checking the grout seal remains important regardless of tile material. Taking these small, consistent steps will significantly extend the lifespan of your terrace and protect the investment you made in both materials and labor.
Mini FAQ: Tiling a Terrace
How long does Tiling Glue take to dry?
Drying time depends on temperature and humidity, but on average, Tiling Glue reaches a stable bond within 24 hours, with full curing typically achieved within a few days.
Can Tiling Glue be used in cold climates?
Yes, Tiling Glue has been tested for freeze-thaw resistance, making it a suitable choice for terraces in regions with cold winters.
Is Tiling Glue suitable for all types of tiles?
Tiling Glue works well with ceramic, porcelain, and natural stone tiles, making it a versatile choice for most outdoor terrace projects.
What happens if I am not satisfied with the product?
Simply contact our team and request a refund under our satisfaction or money-back guarantee, no complicated procedures involved.
Do I need any special tools to apply Tiling Glue?
A notched trowel, a mixing bucket, and a spirit level are generally sufficient for a smooth and professional application.
Conclusion
Tiling a terrace is a rewarding project that can dramatically improve the look and functionality of your outdoor space, but it all starts with choosing the right adhesive. A high-quality, flexible, water-resistant glue will protect your investment for years to come, while a cheap alternative may lead to cracks, leaks, and costly repairs down the line. By following the steps outlined in this guide, from carefully assessing your substrate and gathering the right tools, to planning your layout, mixing and applying the adhesive correctly, and maintaining your terrace over time, you can achieve a professional-looking result even as a beginner. Take the time to prepare properly, respect curing times, and pay attention to the small details like joint width and drainage slope, since these are often what separate a terrace that lasts decades from one that needs repairs within a couple of years. Discover Tiling Glue by Ferber Painting today and enjoy fast worldwide delivery along with our satisfaction or money-back guarantee.